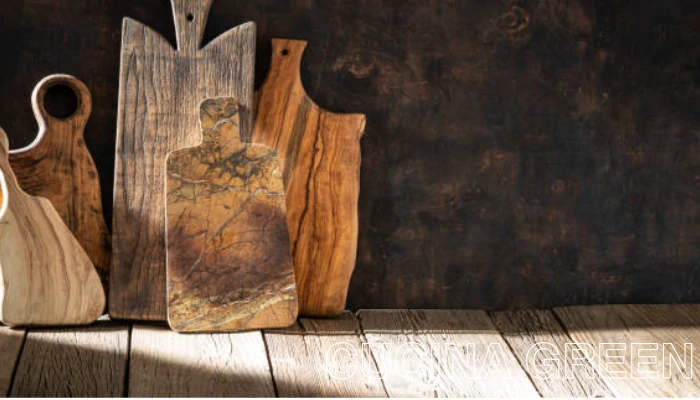
Cutting boards arrive in all shapes and sizes. However, a 3D cutting board takes it to the next level.
With its difficult format and attractive patterns, a 3D slicing board is now not solely a beneficial kitchen device but also a work of art.
Let’s dive into the steps to make your special 3D slicing board.
What is a 3D Cutting Board?
A 3D cutting board is a cutting floor carved and fashioned to create a 3-dimensional design. . If you want to know about What is cutting board oil. Read the article.
Unlike common flat deflating panels, a 3D slicing board provides depth and dimension to your kitchen countertop
Materials Needed to Make a 3D Cutting Board
The following supplies are needed to create your 3D slicing board:
· Wood:
The following supplies are needed to create your 3D slicing board:
· Tools:
A desk saw, wooden glue, clamps, a router, sandpaper, and an ending agent.
· Safety equipment:
Glasses, ear protection, and a dirt mask.
Step 1: Planning and Designing Your Cutting Board
Before you begin, it is fundamental to sketch and diagram your cutting board. If you want to know about How to oil a cutting board. Read the article.
Consider the size, shape, and sample you desire to contain in your 3D design.
Sketch out your thoughts and measurements on paper to information you during the process.
Step 2: Choosing the Right Wood
The desire for wood performs a considerable function in the last result of your 3D cutting board.
Hardwoods like maple and walnut are perfect for their sturdiness and resistance to knife marks. Select first-rate wood that is free from knots or defects.
Step 3: Preparing the Wood
Preparing the timber is essential to ensure an easy and flawless completed product.
Begin with rough-cutting the timber into manageable pieces for additional processing. Then, mill the wood to achieve flat and easy surfaces.
Step 4: Cutting and Shaping the Wood
Using your desk saw, cut the timber into thin strips of varying thicknesses. These strips will shape the distinct layers of your 3D slicing board.
Arrange the strips in the preferred sample and glue them together, aligning each layer perfectly.
Step 5: Sanding and Finishing the Board
Once the glue has dried, it is time to sand the board to reap an easy surface. Start with coarse sandpaper and progressively go to finer grits for a polished finish. Apply a food-safe ending agent like mineral oil or beeswax to defend the wood.
Step 6: Assembling the 3D Design
To carry your slicing board to life, you want to reduce and structure the glued timber layers into your favored 3D design.
Using a router with a range of bits, cautiously create problematic patterns and procedures on the board floor.
Step 7: Final Touches and Polishing
With the foremost factors of your 3D cutting board complete, it is time to add any ultimate touches and polish the surface. If you want to know about How to oil a cutting board. Read the article.
Take the time to refine the edges, spherical the corners, and ensure a blissful grip.
Safety Precautions While Making a 3D Cutting Board
Safety needs to be a precedence when working with equipment and machinery constantly.
Remember to put on protective glasses, ear protection, and dirt masks to shield yourself from plausible hazards. Always examine and comply with the manufacturer’s directions for every device you use.
Care and Maintenance of a 3D Cutting Board
To lengthen the existence of your 3D cutting board, suited care and upkeep are essential.
Wash the board with warm, soapy water after every use and dry it thoroughly. Apply a food-safe mineral oil frequently to preserve the wooden hydrated and forestall cracking.
Benefits of Using a 3D Cutting Board
Using a 3D slicing board no longer solely provides a special and creative contact to your kitchen; it also affords purposeful benefits.
The textured floor helps meals remain in place, decreasing the possibility of unintentional slips.
Additionally, the 3D sketch permits air circulation, preserving the board and meals hygienic.
Tips and Tricks for Making a Unique 3D Cutting Board
- Experiment with distinct wooden kinds and combos for a visually lovely result.
- Incorporate contrasting colors and grains to make your format pop.
- Consider including customized engravings or inlays to make your reducing board unique.
FAQs
How are 3D slicing boards made?
3D slicing boards are made using an aggregate of superior computer-aided format (CAD) software programs and CNC milling machines.
The plan is created digitally and then translated into computer instructions, which are used to carve the board from a stable piece of wood or plastic.
How do you make 3D boards?
A2: To make 3D boards, you want to begin with a 3D diagram using a specialized software program like CAD.
Once the plan is ready, it can be despatched to a CNC milling computer to carve the board following the graph specifications.
This method allows for complex and unique patterns on the floor of the reducing board.
How to make your own slicing boards?
To make your very own slicing boards, you would first want to choose an appropriate material, such as hardwood or food-safe plastic.
Then, you can figure out the preferred dimensions and form for your slicing board.
After that, please comply with the integral steps of cutting, sanding, and ending the board to ensure it is clean and secure for meal preparation.
What materials are used to make cutting boards?
Cutting boards can be made from a wide range of materials. Hardwoods, however, are most frequently used; these include bamboo, walnut, and maple.
These substances are particularly durable, resistant to knife marks, and have herbal antimicrobial properties.
Food-safe plastic boards are also famous for their ease of cleansing and affordability.
How do you make a cutting board step with a step?
To make a slicing board, observe these steps:
- Choose an appropriate material, ideally hardwood, and assemble it to the preferred measurement and shape.
- Mark and reduce the board into the favored dimensions, ensuring it is squared and even.
- Use sandpaper to clean all the surfaces and edges of the board, steadily growing the grit for a finer finish.
- Apply a food-safe finish, such as mineral oil or a specialized slicing board oil, following the manufacturer’s instructions.
- Allow the end to dry before using the cutting board for food preparation.
Conclusion
Making a 3D cutting board is an innovative and profitable endeavor. With the proper materials, tools, and techniques, you can craft a practical but wonderful piece for your kitchen.
So, why settle for an undeniable cutting board when you can convey artistry into your cooking space?
